
So between the crazy weather (totally a good excuse for anything) and just being busy, I'm about two weeks behind on blog posts. On the plus side, this means that I don't have any shortage of things to write about!
To start the recap, I thought I would do a nice Monday manicure recap:
So two weeks ago, I was going for spring time colors.
 |
| Tooth pic Design Hearts |
This turquoise color is one of my favorite nail polishes. It took me ages to track it down in stores last year! I was going to take some pictures of the process for drawing the little heart, but I didn't have anyone around at the time to take pictures and I haven't yet figured out how to grow a third arm. So the next best thing...I'll just give you some steps:
First, what you'll need:
two nail polish colors
basecoat and topcoat (recommended but not really necessary)
a tooth pic
Step 1: Paint your nails with your base color (apply basecoat first if you're going to) and let it dry completely.
Step 2: When you pull the nail polish brush out of the bottle of your accent color you want to get as much polish off it as possible. This works best if the brush is a thin one. What you really want is just the teeny-tiniest drop of polish on the tip of the brush.
Step 3: Make two little dots of polish right next to each other on your nail. You want them to be overlapping very slightly.
Step 4: Take the tip of the tooth pic and very gently touch it to the very top of one of the wet nailpolish drops. You really want to just be touching the very top of the little nail polish bubble.
Step 5: With a little sweeping gesture you want to use the tooth pic to pull the extra nailpolish from the top of the bubble to the outside of your nail and down. This is when you're drawing the sides of the heart.
Step 6: Repeat steps 3 and 4 on the other side.
and Voila! you're done. It takes a little practice but when you get it down it's really quite easy! Now wait for it to dry all of the way before applying topcoat or else you'll smudge your colors together!
So here's where we get to the part about Spring Fever:
I love snow and winter time...but there comes a time when you're just ready for some spring weather. This past monday we had what will probably be our last hurrah for winter weather. It looked something like this:
 |
| Monday Morning Snow |
It was beautiful and snowy and wonderful...but we only really got two inches and it didn't ever stick to the roads. Also the weather has been so weirdly fluctuating that it was 100% melted by the next morning. I think I'm ready for spring now. This was the most snow we've gotten all winter and I'm a little disappointed. Seriously Wintertime...my feelings are hurt by your stinginess. I'm going to have to spend some time with spring and summer to cool off before we can talk again.
Which is how this whole Spring Fever thing started. Now that I've decided I'm ready for spring I'm starting to get impatient. I read this blog post from Sarah @ Married to Med School and it made me think about all of the things that I do to get ready for Spring, or at least to try to encourage it along with signs of soladarity.
I started out the week by painting my nails with my favorite color...YELLOW!
 |
| Sunny Yellow Polish |
What better way to say "Welcome Sun! We've missed you! Please don't burn me this year...that was really quite rude of you last summer." than with bright yellow polish! Oh, and sparkles! For a little extra pizazz (still trying to decide if I like this word), I added pink sparkles to my ring fingers. I love this sparkle polish from essie. It's great because it has varying sizes of glitter which makes it more complex than your average glitter polish. The small, medium, and large glitter pieces help to cover the space in a more interesting way and bring extra pizazz (I guess I do like this word) to your regular nail polish routine.
 |
| Awesome essie LuxEffects Glitter Polish |
The yellow nail polish put me in a nice springy mood, and after reading Sarah's blog post about getting ready for spring it made me want to get ready too. One of the first things I thought about was candles. I love candles! When I thought about warm weather my brain automatically went to my two candles that I had in my apartment over the summer. They both smell amazing and they're both very special.
 |
| The Charleston Candle from My Boy |
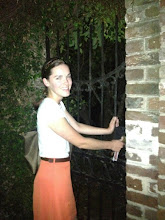
Those of you who know me know that I had the opportunity to spend the summer in the beautiful and fascinating city of Charleston, SC. The one downside of this was that I hardly got to see my family and my Boy all summer. Before I left for Charleston, My Boy gave me the most beautiful present. He found me a Charleston candle. It smells amazing! The company that made this candle perfectly captured the lingering and mesmerizing scent of the hidden fenced gardens and window boxes of the historic SNOB and SOB neighborhoods (that stands for Slightly North of Broad and South of Broad, referring to Broad Street... if you're wondering). While I was away from home and my loved ones for so long I brought my candle with me to remind me to get outside of myself and enjoy the chance I was given to live in the city, as well as to remind me when I felt lonely that the people I loved were back home thinking about me and loving me too.
(yeah...I know...you're thinking "that's a pretty serious candle"...Darn Tootin'!)
My second spring candle is one that I found in a Charleston boutique.
 |
| Rewined Riesling Candle |
These candles are made in Charleston by a company called Rewined. They take old wine bottles and recycle them into beautiful candles. They smell amazing too! The scents are all designed to mimic the scent of different varietals of wine! I got the Riesling one. I love the light fruity scent of this candle. It really brightens up a room and makes the environment smell and feel bright and creative and happy.
After I got out my candles, I started to think about other spring things and my mind immediately went to the lotion I had this summer. The first time I went to the beach this summer I was so careful with my sunscreen...or so I thought. I was really proud of myself when I got back to the house for not getting a sunburn...until I caught sight of my back in the mirror. My entire backside from the nape of my neck to the back of my heels was burned...apparently I missed a couple spots. The funny part was if I stood sideways to the mirror you could see the line down the side of my arm and the side of my leg where I transitioned from completely pale in the front to completely burned in the back. Clearly that spray sunscreen isn't so easy to aim at your own back.
Needless to say, with the backs of my legs terribly burnt, walking and sitting and wearing long pants to work was not fun, which necessitated the purchase of some aloe lotion. I bought the largest, cheapest bottle of after sun lotion that I could find, and ended up loving it! It smelled like coconut and orange!
 |
| Have You Seen This Lotion? |
With my Spring Fever kicking in this past week and my dry skin still not recovered from winter weather, I went on a quest to find my beloved summer lotion. The problem is that I can't remember what I did with it. I have a vague memory of putting it away with the summer pool stuff when I moved back home, but now I can't seem to find it anywhere! I'm starting to worry that I might have forgotten it when I was rushing around packing up to move back. My wonderful smelling lotion might still be in Charleston waiting for the next summer renter to take over that awesome little apartment.
So, seriously...if you see this lotion anywhere, let me know! It is my new quest of the season to hunt down this lotion. One of the pharmacies around here has got to have it...right?
What do you do to get ready for spring? And do you have any fun manicure ideas you'd like to see me try? Let me know!

No comments:
Post a Comment